Crafts Fun and a little Pixie Dust

Crafts Fun and a little Pixie Dust
Askig Me Why I Create Is Like Asking Me Why I BREATHE
Showing posts with label kids crafts. Show all posts

Little "Play Houses"

Little “Play Houses”

Good Things Utah

Lisa Berrett

Friday Feb 6 2015

Supplies

Plastic Canvas- they come in all colors

Felt

Ribbon

Craft thread or floss

Big eyed sewing needle

Embellishments

Hot glue gun and glue sticks


Instructions
I cut my plastic canvas down just a little so it can sit on a table or your Childs lap and they can play with it.
For the houses on the canvas I cut my strips 8 of the little squares which is about 1 ½ inches wide and then depending on how big you want your house cut and sew.
I like to sew all my little houses down really well and then use the hot glue to cover the sewing and then it will last a long time.
For the roads I like to cut a strip of the canvas and sew it down or you can just cut some felt to create the roads and that’s cute as well.
Time to decorate the top of the houses with ribbon, buttons or what ever you’d like
If you want a wall around the whole little village just cut a strip of canvas and sews it on to the edge of the bottom them I like to use my Duct Tape and cover the out side.

This is such a fun little village that your kids will play with for hours and you can take it anywhere if you need something to keep them entertained.

Have so much fun creating!!!

Cutest Aprons ever


Supplies                                   Yes that is Regan under that little Apron

Any plastic bag from the craft store

Ribbon

Glue gun

Duct Tape

Buttons and Embellishments

Fun scissors

Fabric and Paper glue


Instructions

1.     Cut down the sides of the bag leaving the bottom attached you should have two pieces each with a handle at the top.

2.     Cut the sides off right by the stitching on the bag.

3.     Save the sides for the pockets.

4.     About ¼ of the way down cut a smile shape to form a place for your arms.

5.     About half way down I cut 1 yard of ribbon and sewed it to the sides.

6.     For the pocket you can cut out some of the cute designs from the left over bag and hot glue or sew it to the Apron.

7.     I used some Duct Tape around the edge.  

Tips

·       There are some really darling bags at the craft stores and the dollar store

·       You can make two aprons out of one bag.

·       I did sew on the ribbon at the sides of the apron because I wanted mine to last longer but the glue gun does work just fine.

·       Also this is a fun craft for the kids to help with they can embellish them to fit them

HAPPY CRAFTING!
 

PVC Bow and Arrow


Supplies

½ inch PVC pipe

Duct Tape

Pipe glue

Nylon Rope

Scissors

½ inch Foam pipe covers

Embossing tool

Sand paper

Erasers


Instructions

1.      Cut your pipe into 3 equal pieces

2.      Heat up the PVC pipe in the middle it only takes a few minutes. Next bend it to the shape that you want be careful it’s HOT!

3.      Cut your Foam pipe cover about 6 inches and slide onto the middle of the Bow.

4.      Cut a one inch notch into the ends of the pipe. I used my scroll saw. Next place the knot into the slit. Pull tight and make sure the end won’t slip or come out.

5.      Sand the edges where you cut the PVC pipe so it’s smooth.

6.      Cut enough string so you have enough to tie a knot at each end of the bow and burn it so it won’t fray.

7.      Wrap Duct tape around each end of the Bow over the string so it won’t pop out.

8.      Add Duct tape around the foam so it keeps it in place. Now you can decorate your bow any way you like.

9.      I cut my dowels into 16 inches that seems to work good for my Arrows. I cut a slit in the end to fit over the string.

10.   For the end of the Arrow I glued on erasers and wrapped Duct Tape around to hold it tight.


Tips

·        One 10’ PVC pipe will make 3 bows. Cut it into three equal pieces.

·        Pull your string really tight and leave extra just in case you need to tighten it later.

·        It takes lots of practice but you will master it and have hours of fun.

love card games????? this makes it much easier

Card holder with a little pencil counter to keep track if they won

  1. This is made with a piece of wood that has a slit on the top for the cards to slide into
  2. I mod-podged paper and some buttons on the front of the board
  3. I used my smallest drill bit and made a small hole at each side for the wire to fit through and added my colored pencils that I cut and drilled a hole through

FUN card playin for hours and hours

Colored pencil art.....I went a little crazy with this one:)

Colored pencil art
I has soooo much stinkin fun creating this stuff...
first it was just a bracelet then the necklace....
then all heck broke loose and I went "CRAZY"
so take a peek and see what I came up with...
I did seal all the pencils with a wood sealer so the colored pencil doesn't come off on to your clothes

sooooo love these little flowers...I used my scroll saw...sander...and drill to cut and sand the pencils to create the flowers...
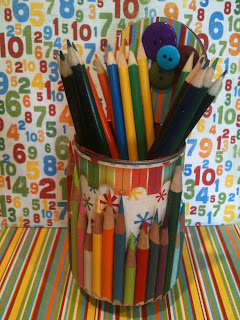
used a few cute buttons and paper to the can and I was happy

I think this would be a fun teacher gift...fill it with treats or pencils
and this didn't cost much at all to make

I had this box and thought it would make a great little home to store all my crayons and pencils in...I think my bitty bums will love it

Have fun creating my friends

FUN kids crafts

Puzzles made out of your family fav's...for hours of fun

Clay "CRITTERS"
create animal for hours of fun...no bake clay it air dries


Duct Tape FUN...
walletts..little purses...tooth fairy keepers and much more

Foam monsters...
your kids will create little friends that they will play with for hours
Shrink film creations...
I loveeee this shrink film...the kids can color what ever they want...and then use a blow dryer and watch it shrink
 Ribbon wands...
 are so fun for dancing the kids just love them

Paper dolls
That you've made look the way you want....clothes are made from felt..ribbon and bling

Busy books for your "Bitty ones"

I have 36 6x6 pages of precious people in my life that will keep my "Bitty bums"
busy looking at them and their cousins for hours
this has been so much fun to create


Busy books for your “Bitty bums”
This would be great for grand children that have Grandmas, Grandpas, Aunts and Uncles that live far away.

Supplies needed for this fun project
  • Your favorite paper
  • Photos 2 of each photo you will be using
  • Stickers and letters
  • Glue Stick
  • 6 by 6 Page protectors
  • Ribbon
  • Metal rings for your book
  • Glue gun , and your fav glue sticks
  • Velcro they have black or white
  • laminate or contact paper
Instructions for this priceless project
1.This is such a fun way to use your favorite photos, paper stickers into busy books that will last for a life time
First you have to have doubles of what ever you’re using for example 2 of each photo, sticker or animal
2. cut your paper to fit inside your page pocket you can get 4 pages out of one sheet of 12 by 12
3. create your page and glue your photo on the paper and slide it into the pocket
4. I used the glossy Laminate sheets and ONLY laminate the top of the shape or the glue won’t stick to the back when you glue the Velcro on (Vie tried and it doesn’t work)
5. Cut the shape out around the out side and its ready to put into the keepsake envelope
6. with the hot glue gun I glued Velcro to the back of the photo and the other piece of the Velcro glue to the page protector on the out side
7. This will make such a fun matching game , my bitty bums LOVE it
8.use bright fun colored ribbon to tie the pages together or you can use rings. If you have binders that are ready for your pages that would be great to


All your fav photos in a book that will keep your bitty ones busy for hours
a little paper, ribbon and glue could never be so much fun.


As you can see I made the 6 by 6 page just like I would do for my scrapbook, then slipped it into the page protector
 then I cut out the photo of Carsten, ran it through my laminter (or use contact paper) trim around the edges
and glued the Velcro on the back.
put it on the other photo so I know where to put the other part of the Velcro


Bling and Embellish with Ka-Jinker

CuttleKids 1-2-3 Book

Look What I Did! Box

Paper Dolls

Disney Table and Chairs

Felt Books

"Tip Toe Through the Tulips" Craft & Gift Ideas!

Pretty Purse Photo Albums

My Coloring Center